Mastering Studio Portrait Lighting: My Journey with Rembrandt, Broad, and Split Lighting
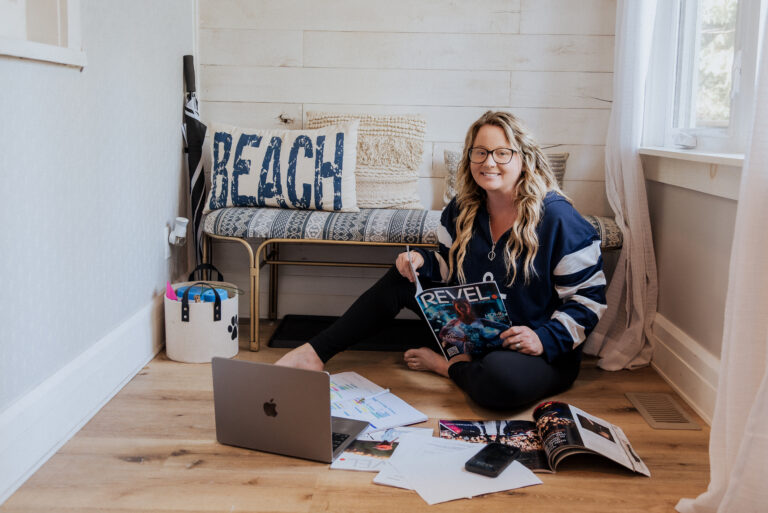
Stepping Into the Studio
Studio portrait lighting has always felt like both an art and a science. After years of working with natural light and on-location shoots, I decided it was time to master the fundamentals of studio lighting techniques. I focused on three classic lighting patterns every portrait photographer should know: Rembrandt lighting, with its distinctive triangle of light on the cheek; broad lighting, which illuminates the side of the face toward the camera; and split lighting, which creates dramatic contrast by illuminating exactly half the face. Each technique offers a different mood and serves different subjects, and learning to execute them properly has been an invaluable addition to my skill set.
The Constant Light Challenge
What made this learning curve steeper was my decision to work with constant LED lights rather than strobes. While strobes are the industry standard for studio work, offering powerful output and the ability to freeze motion, I wanted to understand how light shapes the face in real-time. Constant lights let you see exactly what you’re getting before you press the shutter, which is phenomenal for learning. However, they present unique challenges. The lower light output meant working with wider apertures and higher ISOs, making it harder to achieve the tack-sharp focus and depth-of-field control that strobes provide so easily. Colour temperature shifts became more noticeable. I had to be much more deliberate about white balance. Managing ambient light in the studio was also trickier since constant lights don’t overpower room lighting the way a powerful strobe flash does.
Understanding Each Lighting Pattern
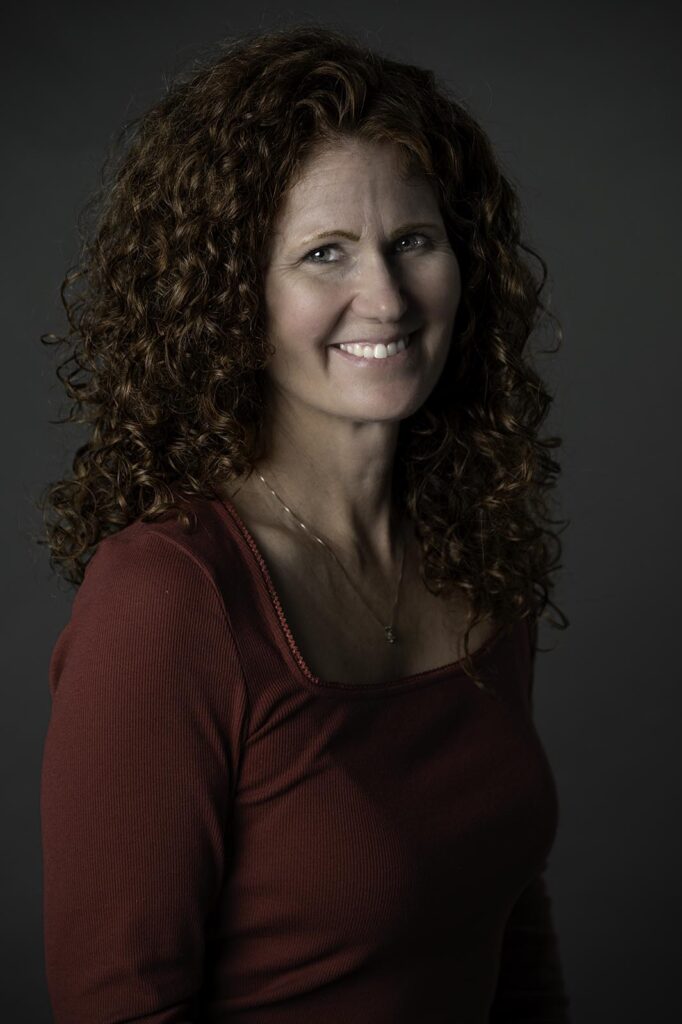
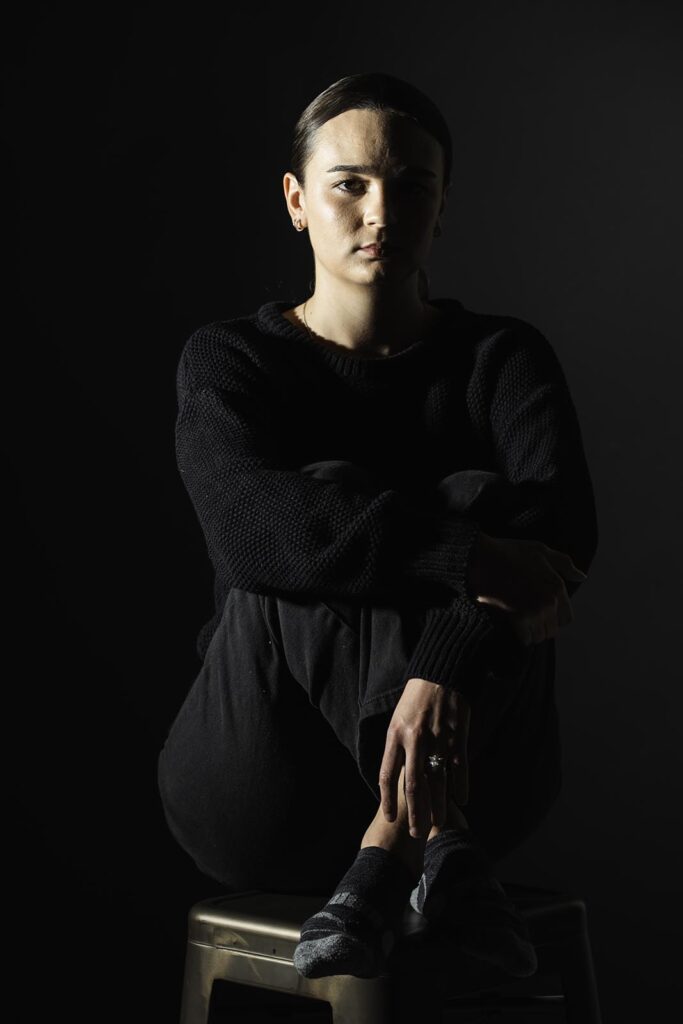
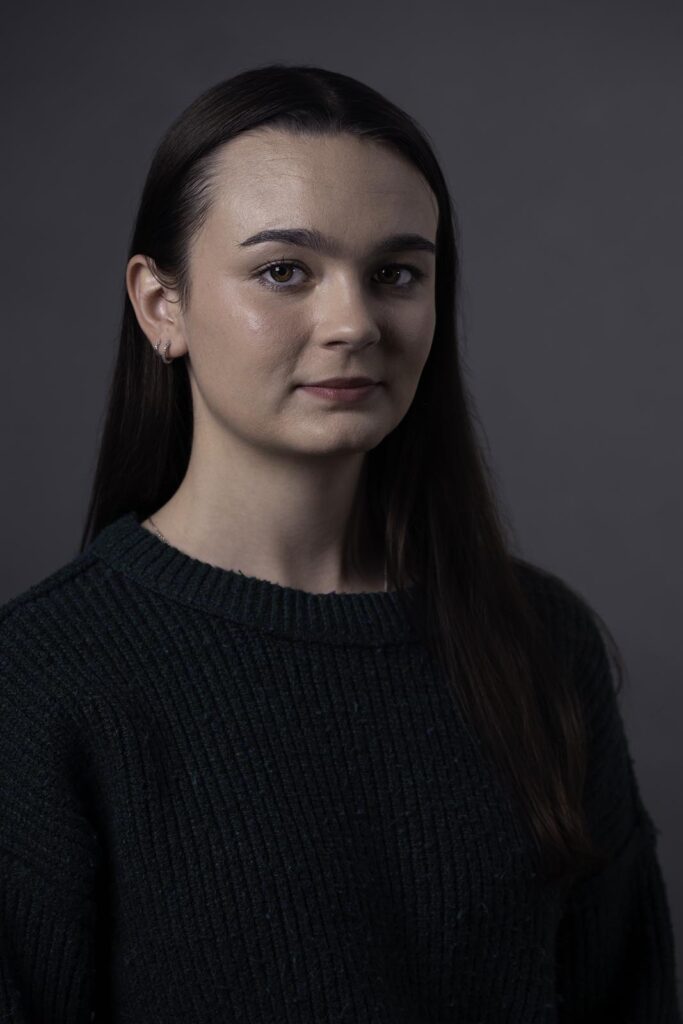
Rembrandt lighting quickly became my favourite for its versatility and the dimension it adds to portraits. Named after the Dutch painter who frequently used this pattern, it’s characterized by that signature triangle of light on the shadow side of the face, just below the eye. Positioning the light at a 45-degree angle, slightly above the subject’s eye level, created the perfect balance between drama and approachability. Broad lighting, illuminating the wider side of the face as it turns toward the camera, was excellent for subjects with narrower faces, making them appear fuller and more evenly lit. Split lighting proved the most dramatic of the three, with light hitting exactly half the face and leaving the other half in shadow. It’s bold and masculine, creating an incredible mood, though it’s not flattering for every subject.
The Value of Deliberate Practice
Working through these lighting patterns with constant lights forced me to slow down and truly understand the relationship between light, shadow, and facial structure. I learned to see the subtle differences that a few inches of light placement can make, how the height and angle of the light source affect the shadow under the nose and chin, and how reflectors can soften or fill shadows to varying degrees. While I’ve since incorporated strobes into my studio work for their power and versatility, starting with constant lights gave me a foundation that makes me a better photographer, regardless of the equipment I’m using.
Ready to Capture Your Perfect Portrait?
Whether you’re looking for classic, timeless portraits or dramatic, artistic images, understanding studio lighting techniques lets me create the exact look you envision. I’d love to work with you to create stunning portraits that you’ll treasure. Visit my portfolio to see examples of my studio work, or contact me today to schedule your session. Let’s create something beautiful together.